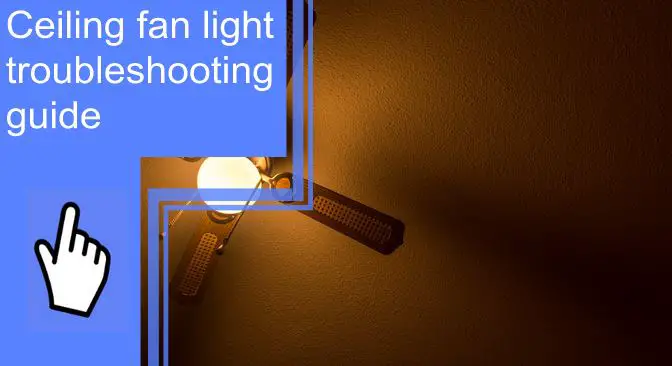
What you find on this page:
If your ceiling fan light isn’t working, you should determine the cause before calling a professional. Depending on your ceiling fan light, this may be an easy fix.
However, read on if you have been experiencing issues with your ceiling fan light and would like some help fixing them! This guide will troubleshoot ceiling fan light tips if your light does not work.
Reasons why a ceiling fan light doesn’t work
There are a few reasons why a ceiling fan light might not work. Here are some of the most common reasons:
1. The light is faulty.
2. There is no power on the circuit breaker. Turn on the circuit breaker and connect all wires.
3. The switch is defective. Replace the switch if it’s not working properly.
4. The light bulb is broken. Replace the light bulb.
5. The fan is not working. Check the blades, motor, and wiring.
6. The fan is not installed properly. Ensure the fan is securely mounted to the ceiling and the blades are in the correct position.
7. The fan is not plugged into an outlet. Try plugging the fan into another outlet.
8. The fan is not properly cleaned. Clean the fan with a soft, dry cloth.
Ceiling Fan Light Troubleshooting: Easy fixes
If your ceiling fan light is not working, you can try a few easy fixes. These include solutions that do not require professional assistance.
1. Ensure Power is Reaching
A ceiling fan light that’s not working can be fixed by checking a few things before calling a professional.
1. Ensure power is reaching the fan light. Check that the cord is plugged into an outlet and that the switch is turned on.
2. Check if the light is burned out or defective. To test this, turn off the main light in the room and turn on the fanlight. If the fanlight doesn’t work, the light is likely burned out.
3. Check if debris is blocking the light from getting power. Remove and clean any dust or debris that could block the light from receiving power.
4. If all of these solutions fail to fix your fanlight, you may need to call a professional for assistance.
2. Check the Ceiling Fan Light Bulbs
Check if the bulbs are screwed in correctly on the socket. Check the proper wattage of the bulbs. It may also be a good idea to replace the bulbs in your ceiling fan lights. One of the bulbs may have burned out. You can replace the bulbs yourself by following the instructions below.
First, turn off the main fixture in the room to replace the bulbs. Next, remove the old bulb. Then, insert the new bulb into the socket and screw the socket back onto the fixture. Finally, turn on the main fixture again.
3. Inspect the Ceiling Fan Light Sockets
If your ceiling fan light doesn’t turn on, there’s a chance that the light socket is not working properly.
To troubleshoot the problem, inspect the light socket to ensure it’s plugged in properly. Also, check for any burn marks around the base of the socket. It means the socket was damaged during installation or has a wiring problem. If the socket is damaged, you’ll need to replace it.
4. Ceiling fan remote control reset
The remote control may also malfunction if your ceiling fan is not working. Follow these simple steps to reset the remote and get your ceiling fan working once again:
1. Turn off the ceiling fan with the wall switch. Wait for 10-30 seconds.
2. Remove the batteries from the remote control and put them back on.
3. Turn on the fan again.
4. Your remote should have a pair or reset button. Hold down the “pair” or “reset” button for at least 10 seconds. Try pressing and holding both the power buttons for your fan and light simultaneously if you cannot find one on the remote.
Your remote will flash. It indicates a successful resetting. Point the remote control toward the ceiling fan and press the power button to turn on the fan. The remote should work.
5. Inspect the Ceiling Fan Wiring
If you are experiencing problems with your ceiling fan light, there is a good chance that the wiring is at fault. Following these simple steps, you can inspect and potentially fix any issues with your wiring.
1. Check the connection between the fan and the light fixture. Ensure that the two pieces of equipment are connected electrically.
2. Look for any frayed or damaged wires. If you find any visibly damaged wires, they will likely need to be replaced.
3. Check for proper ground connections. Many problems with ceiling fans can stem from improper ground connections. Ensure all the wires in your circuit are connected to the ground at the fan and light fixture.
4. Check for power issues. If you are still experiencing problems with your ceiling fan, it may be necessary to check for power issues. Many times, a weak or incorrect outlet can cause problems with wiring.
You may also need to check the fuse box for any blown fuses. It may be necessary to replace the entire ceiling fan assembly if none of these solutions work.
6. Check the light kit wiring
If your ceiling fan light doesn’t work, there’s a good chance that the light kit wire connections are either bad or missing. Here’s how to check them:
1. Remove the light holder by unscrewing the screws.
2. Find the light kit wires and pull them out of their connectors. Make sure they’re not twisted together.
3. Check the connector for continuity by touch-testing with a multimeter of each wire against each connector pin one at a time.
4. If one of the wires is bad, it will not contact any pins. In that case, replace the wire connector with a new one from your lighting kit.
5. Reattach the light holder by screwing it back in place and re-tinning the screws.
5. Turn on your ceiling fan and test whether the light works now.
7. Check the wiring and switch of the ceiling fan light
The wiring for the ceiling fan light is usually located at the bottom of the motor. If these wires have been disconnected from the ceiling fan, the blades may rotate, but the lights will not illuminate.
- Remove the screws from the fan motor and the light deck that holds the fan motor to the light deck.
- In the switch housing, you will find the plug connections.
- Connect the white wire to the motor and the blue wire to the light assembly.
A pull cord is often used to control ceiling fan lights. Pull cord switches should be checked for operation. During normal operation, you can feel a noticeable click. The switch can be replaced if it does not retract and click when pulled.
It is easy and inexpensive to install a new switch. Before removing the old switch, disconnect the wires and loosen the nut holding it in place. When installing a new switch, the steps are reversed.
8. Replace the Pull Chain Light Switch
There is a possibility that a broken pull chain is causing your ceiling fan light not to work. Replacing the pull chain light switch is a quick and easy fix that can save you time and frustration.
- Use a small screwdriver to open the switch.
- If there is a broken chain in the mechanism, then it must be removed.
- Replace the old chain with a longer piece.
- By reassembling the switch, you must replace the chain and spring.
- It is now time to reattach the nut to the switch and place it inside the fixture once again.
9. The ceiling fan light won’t stay on
Be sure that the bulbs are securely screwed into their sockets. Ensure the light bulb assembly is working properly and has the correct wattage. Check the burned-out bulb in a working lamp to determine if it is still working. If a bulb is burned out, replace it with a new bulb with the correct wattage.
Fix a Ceiling Fan Light by Removing the Regulator
If your ceiling fan light is not working, there are a few things you can try to fix the problem. The first step is to remove the regulator. This is a small metal piece near the light assembly’s base. It controls the amount of electricity that flows to the light bulbs. If it is defective, the fan light may not work. To remove the regulator, follow these steps:
1. Open the bottom unit and look for the “hot” side wire
First, open the bottom unit and look for the “hot” wire. If the light is not working, this will be the wire you need to check.
2. Check voltage and troubleshoot
You can check the voltage with a voltage detector. If the voltage is high, there may be a problem with the regulator itself. You can try replacing the regulator or replacing the entire fan unit.
3. Cut power
If you still cannot turn on your fan light, you may have a problem with your power supply. Unplug the ceiling fan and test them in another outlet to check this. If everything looks okay, your power supply may be defective, and you will need to replace it.
4. Remove or replace the regulator
To remove or replace the regulator, follow these steps:
1. Unplug the wires from the light fixture and the electrical outlet.
2. Open the ceiling fan by unscrewing the screws that hold it together.
3. Remove the cover from the light fixture.
4. Remove the regulator from its mounting bracket. Be careful not to lose any screws that hold it in place.
5. Replace the regulator and screw it into its mounting bracket. Reattach the cover to the light fixture and plug in the wires.
5. Test and re-install the fixture
Turn on all switches and check they function correctly. Once you have tested the fan, install it back into position. Make sure the blades spin freely and that the lights come back on.
Conclusion
Ceiling fans are an excellent way to cool down rooms during hot summer days and light up the room when it is dark. However, when they stop functioning, it can become quite frustrating. Fortunately, fixing a ceiling fan light is easy. Follow the above instructions carefully to get your fan ceiling light up and running again.
FAQ
In the event of a blown bulb, ceiling fans with single bulbs will not produce light. Therefore, it is important to ensure the bulbs are correctly seated in their sockets. In addition, ensure the bulbs have the proper wattage for the ceiling fan light assembly.
Ensure the switch is turned off to repair a ceiling fan light that doesn’t work. Next, try turning the power off at the breaker box. Finally, flip the switch back on. If the connections are okay, try replacing the light bulb with a known good one. If that still doesn’t work, then call for professional help.
No, ceiling fans don’t have a reset button. But they have a remote control that allows you to reset the ceiling fan light remotely.
The light may not work with a new bulb due to a tripped circuit breaker or a blown fuse. In addition, a bulb can burn out immediately when an on/off switch is turned on.
No, ceiling fans don’t have fuses. Instead, a ceiling fan operates only with fuses in its electrical circuit breaker.