What you find on this page:
A lack of basic understanding of the 3D printing process is the most common reason users have issues with their 3D printers. One of the leading causes of troubleshooting issues is an incorrect setup.
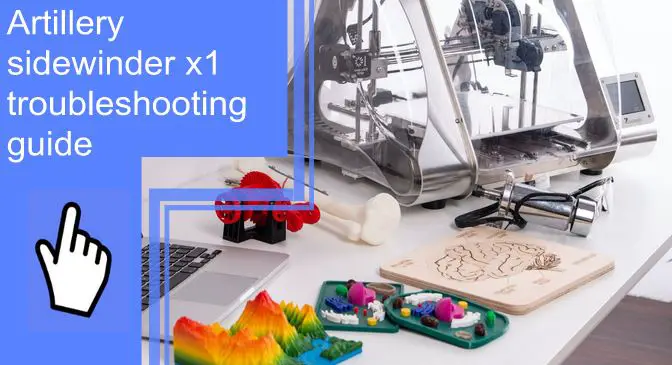
There are also 3D printing issues like warped prints, stringing filament, prints that don’t stick to the bed or stick too hard, blocked nozzles, shifting layers, and failed bridges. This Artillery Sidewinder X1 troubleshooting guide will help you resolve your issues. Read on now!
Troubleshooting: The Most Common Problems and Solutions
The majority of 3D printing problems can be resolved by troubleshooting them:
1. Can’t connect to the printer from a PC software
The 3D printer cannot be connected to a PC software for several reasons:
- Not installing the CH341 serial driver.
- Using the wrong serial port.
- Other software uses the serial port.
- Setting up the wrong baud rate.
- The bad USB cable needs to be replaced.
2. Prints not sticking to the bed
- Make sure the bed or the print platform is clean.
- Prints need a textured base to stick, so you need a better bonding surface.
- Increase the temperature of the bed’s surface by 5C.
- Preheat the print bed 5-10 minutes before printing so the bed edges aren’t cold.
- Check to make sure the print platform is even.
- Check the distance between the print bed and the nozzle; increased distance can cause the 1st layer to get dragged on the surface.
3. Prints not releasing (sticking too hard)
- Before removing the prints, let the print bed cool down to 24°C (room temperature).
- If you want to speed up the cooling process, you can use ice bags. Make sure they don’t leak, though.
- Spray IPA around the print base and let it soak for 2-3 minutes. You can then try to remove the print again.
- Using a spatula may work if nothing else does, but be careful not to scratch or damage the bed.
4. Extruder making funny noises
Sometimes the extruder motor doesn’t rotate or twitches in place and makes a cracking noise. Then you should try these steps:
- First, check the extruder block and ensure the ribbon cable is inserted correctly.
- Confirm your nozzle is heated and the temperature is suitable for the filament.
- Extruder idler lever tension should be adjusted.
- Try a cold or Atomic pull if the nozzle is clogged.
- Try swapping the extruder motor driver with one from another axis if the driver is faulty.
- Try to contact support if nothing else works.
5. Getting a “no printer attached” error after hot end swap out
Follow these steps if you receive a no printer attached error after replacing the old hot end:
- Make sure the flat cable is connected correctly and inserted.
- Use the old hot end’s ribbon cable in the new one to check if it’s working.
- Check if the hot end assembly shows the same error after temporarily wiring back the previous hot end. The problem is with your new hot end if no error is displayed.
- If there are any faulty wiring or connections, you can try to disassemble and reassemble.
6. Clogged extruder/nozzle
It will not release filament if the nozzle is clogged or blocked.
- Select the heat-up nozzle setting and use a needle to clean it.
- If any filament is stuck inside, push it through by removing the feeder tube.
- Dismantle the hot end to remove the filament and reassemble it.
- You can try doing a cold pull or an Atomic pull.
For Atomic Pull:
- Choose a material, either ABS or Nylon.
- Remove the filament.
- Increase the nozzle temperature to 240 degrees.
- Apply pressure to push the filament through till it flows from the nozzle.
- Reduce the nozzle temperature to 140° degrees for Nylon and 180° degrees for ABS and leave it for 5 minutes.
- Extract the filament from the head.
7. Stringing
When moving the print head, filament drips over the print like web strings. To avoid this:
- Activate retraction using slicing software.
- Reduce the minimum travel before retraction.
- Then, use a scalpel to remove the strings and clear the print.
8. Warping
Warping occurs when the plastic cools too quickly, bending the print and causing cracks in the upper parts. To troubleshoot this issue:
- Use a print platform that is heated.
- Apply a small amount of glue on the edges evenly for increased adhesion.
- Switch to a print bed with adhesive instead of the usual glass one.
- Check the calibration to ensure a level print bed with the correct nozzle height.
- Add rafts or platforms to increase the contact.
- Finally, adjust the advanced print settings for both temperature and fan cooling.
9. Rings and Waves
The visual effect of ripples or waves on your print surface is called ringing. The cause of this issue is usually vibration or speed, and sometimes both simultaneously.
- Use a solid surface to reduce vibrations.
- Check the linear bearings to ensure they’re not worn off.
- Keep everything bolted and tightly shut.
- Clear the rods of dirt and dust and add oil to lubricate.
- Decrease the print speed.
- Adjust the Artillery Sidewinder X1 firmware acceleration.
10. Elephant Foot (wide, flared base)
The elephant foot effect occurs when the model’s base bulges slightly outwards. To prevent this from happening on your prints:
- Lower the temperature of the print bed by 5° degrees at intervals to cold down the base layers.
- Level the print bed.
- Raise the nozzle height slightly.
- Chamfer the base of the model.
11. Layer Shifting
The misalignment of layers causes shifting layers. A loose belt usually causes this. To prevent this issue:
- Check the printer belts and ensure they’re tight but not too tight.
- Make sure one end of the belt hasn’t slipped.
- Keep the rod clean and well-lubricated.
- Look for any misaligned or bent rods.
- Make sure there’s no slip between the drive pully and rod or stepper.
12. Sagging/Failed Bridges
As a result of bridging, filaments can sag. To get rid of this issue:
- First, print a test print with columns and bridges to check its bridging capabilities.
- Add support under the structure.
- Increase the fan speed to cool the filament quickly.
- Decrease the extrusion speed, so the filament has time to set.
- For faster printing and slower extrusion speeds, use 3D printing software like SIMPLIFY3D.
13. Layer Separation
Layer separation occurs when SLA print layers don’t bond properly. To prevent this:
- Generate support for all severe points and angles.
- Keep the laser’s path clear and unobstructed.
- Finally, keep the cleaning in IPA minimal.
Conclusion
This Artillery Sidewinder X1 troubleshooting guide helps you solve the most common problems with 3D printers. For example, you can solve problems such as warping or wavy prints, elephant feet, atomic pull, clogged nozzles, layer shifting or separating, and extrusion making too much noise.
It will also help you find out how to update your printer’s firmware and what kind of software it uses. This is not just a troubleshooting guide; it also gives you a perspective on the Artillery 3D printer. Thanks for reading!
Frequently Asked Questions
An Artillery printer consists of two components, the TFT and the motherboard, each with its own firmware. Unfortunately, the only way they can communicate is through a serial port. As a result, the USB firmware upgrade of the motherboard is blocked by this serial post, so you will have to do it yourself.
1. First, open the printer and disconnect the TFT from the mainboard.
2. Unplug the ribbon cable at one end.
3. Connect the printer to your PC and use the PrusaSlicer to upload the hex firmware to the motherboard.
4. The TFT can be updated via an SD card.
Before printing, you need to assemble and calibrate your Artillery Sidewinder X1.
1. First, install the gantry on top of the main base.
2. Insert the part holding in the X and Z axis into the printer base.
3. Locate the four screws under the base and tighten them to fix the gantry.
4. Connect the Z-axis wires and the ribbon cable, and remove the extruder cover.
5. Install the spool holder on top of the gantry and the sensor for filament runout.
6. Plug in the device, install the filament spool, and then you can start the calibration process.
To calibrate Sidewinder X1, first, you need to level the print bed, adjust and then measure the E-steps, the feed rate, the flow rate, and the acceleration. The X1’s extruder steps, or E-steps, specify how many stages the motor of the extruder must take to transfer one millimeter of filament; the X1’s E-steps/mm calibration procedure is as follows:
1. Install a terminal or host software like Pronterface.
2. Use a USB cable to plug in the printer to your PC.
3. Launch the Pronterface software and set it up with Baud Rate and COM port.
4. From the nozzle entry point, measure 100mm of filament and mark it.
5. To check the latest E-steps/mm value, enter the M503 command in the Pronterface.
6. Enter M83 and then type in G1 F100 E80. The nozzle would extrude 80 mm millimeter of filament with this command.
7. After finishing, calculate the amount of 80mm filament the printer extruded.
8. Use the following calculation to determine the required E-steps/mm and enter the latest value:
New E-steps/mm value=Requested extrude amount/Measured extrude amount*Current E-steps/mm.
For instance, 80mm(requested)/90mm(measured extrusion)*500(current E-step value)=444.44(new E-steps value)
1. In Pronterface, input M92 Exxx.xx at the starting of G-code and replace xxx.xx with the estimated digit of the latest E-steps/mm value. For example, M92 E444.44.
2. To keep this setting, enter the M500 command.
The Artillery Sidewinder X1 uses Ultimaker Cura software, an impressively fast slicer. The software is easy to use and provides the best performance. Editing, rotating, building support, printing models, and playing with other settings are all possible. You can also control your printer with another program.
In addition, you can switch between multiple devices, automatically build support or customize, run simulations before printing to spot design errors and test many advanced features with SIMPLIFY3D.
The firmware for the Artillery Sidewinder X1 comes well configured. This device uses a variant of the Marlin firmware. Upgrade the Artillery Sidewinder to Marlin 2.0.5.3 to get all the features.