What you find on this page:
The Kindle Fire is a popular eReader from Amazon. This device allows you to read books and documents on the go, and newer models have additional features such as a built-in browser.
Connectivity is an important feature on the Kindle since you need to go online to download eBooks. Some models also give you access to an online dictionary or let you share your reading progress on Goodreads.
If your Kindle Fire will not connect to Wi-Fi, you can follow a few steps to troubleshoot the issue.
Kindle Fire Will Not Connect to Wi-Fi: Problems and Solutions
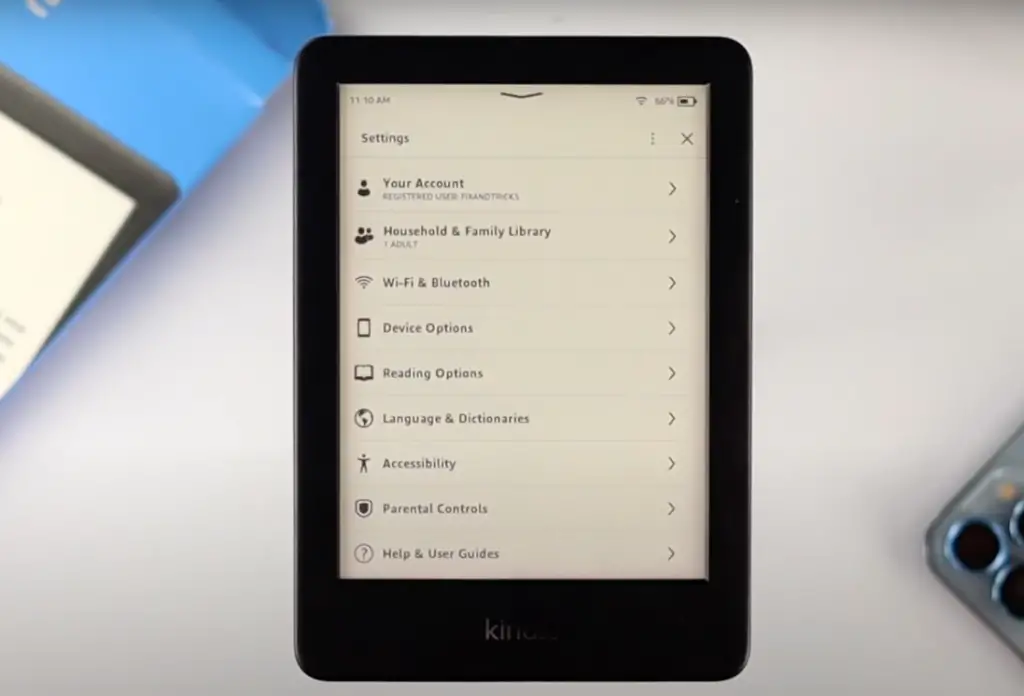
You can check the status of your connection by looking at the Wi-Fi icon in the top right corner of your Kindle screen. Read on to learn more about what to do if your Kindle is offline.

The Internet Is Not Working
Your Wi-Fi network is the first thing you should check. Make sure you can go online and load a webpage on another device to rule out issues with your Wi-Fi network.
There are a few things you can do if your Internet is not working:
- Restart your router. Unplug it and wait 10 seconds. It’s important to wait a few seconds so that internal capacitor chips can fully power down and let your router reboot. Restarting your router will reset your Internet settings and can fix connectivity issues.
- Likewise, restarting your Kindle can reset your connectivity settings and fix the problem.
- Is your Kindle within range of the router? Most routers have a range of 150 to 300 feet. If your Kindle won’t connect to a hotspot, place it closer to the hotspot device since the range is usually limited.
- Charge your Kindle battery. A low battery can make it difficult to maintain a Wi-Fi connection.
- Check your router settings. Some routers have a built-in firewall that allows you to block some devices. Make sure you didn’t accidentally block your Kindle.
- Contact your Internet service provider if you have a Kindle connected to Wi-Fi but no Internet. There might be an outage in your area or an issue affecting your Wi-Fi network.
Airplane Mode Is On
Airplane mode is a feature that disables Wi-Fi and Bluetooth connectivity. It prevents interference with aircraft equipment when flying and is also a convenient way to make your battery last longer if you don’t need to be online.
If your Kindle Fire will not connect to Wi-Fi, make sure you didn’t turn on airplane mode by accident. If this feature is on, you should see a small airplane icon in the top right corner of your Kindle screen.
Swipe down to open the Quick Actions menu, look for Settings, and Airplane mode to disable it.
Note that Amazon introduces Airplane mode on 6th generation Kindle devices. Older Kindles don’t have this feature.
Wi-Fi Password Is Incorrect
If you’re running into issues with an Amazon fire tablet that won’t connect to Wi-Fi authentication problem, the Wi-Fi password might be incorrect.
Your Kindle will prompt you for a Wi-Fi password the first time you connect to a network. Your device will then save this password. If the password changes or you make a typo when entering the password, your Kindle won’t be able to connect to the Internet.
You can fix this issue by deleting the saved Wi-Fi password on your Kindle:
- Swipe down to open the Quick Actions menu and tap on Settings.
- Tap on All Settings > Wireless > Wi-Fi Networks.
- You should have an option called “Delete Saved Wi-Fi Passwords.”
You can also use this method:
- Access the Wi-Fi Networks setting.
- You’ll see a list of saved networks.
- Tap on the network you want to connect to and look for the option called Forget Network.
You can then add the network manually:
- Go back to the Wi-Fi Network settings.
- Your Kindle will display a list of nearby networks.
- Look for your network and tap on it.
- Your Kindle will prompt you for a password.
If you’re not sure what your Wi-Fi password is, there are different methods you can use to find it:
- Check your router. A sticker should be on the back or underneath it with your network name and password.
- Look for the documentation your ISP sent with your router. You should have a card with your default network password on it. Many ISPs use ‘admin’ or ‘password’ as your default password.
- On your computer, open your Settings and select Network and Sharing Center. Click on Connections and look for your Wi-Fi network. Select Wi-Fi Status and Wireless Properties before navigating to the Security tab. You will see a field with the saved password, and you can check a box to show the characters of the saved password.

Software Is Not Updated
Running an old version of the Kindle software on your device can result in connectivity issues. You’ll have to update your Kindle software before connecting to your Wi-Fi network.
Check the current version of your Kindle software. Swipe down to open the Quick Actions menu and tap on Settings. Scroll down, and you should see your software version at the bottom of the screen.
The latest software version depends on your Kindle device’s model and generation. The next section will have more details on finding your software version and updating your Kindle.
How To Update Kindle Software?
Amazon releases new versions of the Kindle software regularly. Your device should download the latest software version automatically, but you’ll have to do it manually if your Kindle is offline.
Running an old version of the Kindle software can cause connectivity issues, so it’s one of the things you should check if your Kindle is not finding your Wi-Fi network.
Connect Your Kindle to Your Computer
Start by connecting your Kindle to your computer. You must plug in your Kindle with the USB cord you use to charge it.
If you don’t have the original charging cord with your Kindle, you can use any micro USB cord to connect your Kindle.
Wait a few seconds for your computer to recognize your Kindle. Your computer will display your Kindle as a removable drive.
You can access your Kindle under This PC > Devices > Drives on Windows. If you’re on Mac, your Kindle should appear as a desktop icon, but you can also find it under Locations and Finder.
Find the Latest Software for Your Kindle
You can then download the latest software version for your Kindle. Your best bet is to visit the Kindle help section of the Amazon website. You can find third-party websites that let you download software updates for the Kindle, but it’s safer to download these files from Amazon.
The latest software update depends on your Kindle’s model and generation. Swipe down to open the Quick Actions menu, tap on Settings, and select Device Info. A new window will open with information about the model and generation of your device.
Here’s a quick summary of the different software version numbers available:
- If you have a Kindle Paper White not connecting to Wi-Fi and your generation number is 7 or 11, you’ll need software version 5.15.1. You’ll also need this software update for an 8th or 10th-generation Kindle or the 9th and 10th-generation Kindle Oasis.
- If you have a Kindle Voyage 7th generation, you’ll have to download version 5.13.6.
- Kindle Paperwhite devices from the 6th and 7th generations need version 5.12.2.2.
- The 5th generation Kindle Paperwhite should run with software version 5.6.1.1.
- Older Kindle devices from the 4th and 5th generations need version 4.1.4.
- You’ll have to download software version 5.3.7.3. if you have a Kindle Touch 4th generation.
- The software version numbers are different for older devices. If you have a 2nd generation Kindle, you’ll need version 2.5.8. while a 1st generation Kindle requires version 1.2.1.
Note that you might not be able to download the latest software update right away. On some Kindle models, you’ll have to progressively install updates until you reach the latest version available.
For instance, if your Kindle 4.1.1. won’t connect to Wi-Fi, you’ll have to install version 4.1.2 followed by 4.1.3 and 4.1.4. If your Kindle 3.4.3 won’t connect to Wi-Fi, you’ll have to install software version 4.1.0 before installing the next four upgrades to reach version 4.1.4.
Find your Kindle model and generation on the Amazon website and follow the instructions specific to your device.
Move the Downloaded File to Your Kindle Device
Once you have downloaded the software update, you can move this file to your Kindle.
Open your Downloads folder on your computer, click on the software update, and drag and drop it to your Kindle drive. Wait for the file transfer to complete.
Right-click on your Kindle to eject it and disconnect it from your computer.
Open Settings and Update Software
You can now install the update on your Kindle:
- Swipe down to open the Quick Actions menu and select Settings.
- Look for Menu and tap on Update your Kindle.
- Your Kindle will ask you to confirm that you want to install an update. Tap Yes, and you will see a screen that says your Kindle is updating.
Repeat these steps until you have installed the latest version of the software available for your Kindle model and generation. You can then try to connect to the Internet again.
Conclusion
If your Kindle Fire will not connect to Wi-Fi, your best option is to check your network, restart your router, and reboot your Kindle. You should also check that you don’t have airplane mode enabled and that your Kindle is running the latest version of the software available.
Now you have all the information to resolve this issue, however, if you need further assistance, our team will be happy to help you! Don’t hesitate to contact us.
FAQ
Read on to learn more about fixing connectivity issues with your Kindle.
Press the power button and select Shut down or Restart when the menu appears. You can also restart your Kindle by pressing the power button until the screen goes blank and keep pressing the button for 40 seconds once the screen goes blank.
Select your current network in the Wi-Fi and Bluetooth menu. Tap Forget network and look for the network again in the Wi-Fi and Bluetooth menu.
Your Kindle should download the latest available software version automatically. You can download software updates on the Amazon website and put these files on your Kindle if it doesn’t.
Go to Settings, All Settings, and Device Options. Tap on Menu, and you’ll see an option called Reset or Reset device. Note that resetting your Kindle will erase your saved settings and downloaded files.
How do I manually connect my Kindle to Wi-Fi? Go to Settings and tap on Wireless or Wi-Fi and Bluetooth. You’ll see a list of available networks. Tap on your network and enter your password to connect.
More related content
Why Won’t Kindle Connect to Wi-Fi? The Definitive Solutions
Fire TV Cube Stopped Listening: Check How To Fix It
Amazon Fire Stick Troubleshooting: All The Answers
Can I Return Amazon Items Without Packaging? – The Answers Here